Home
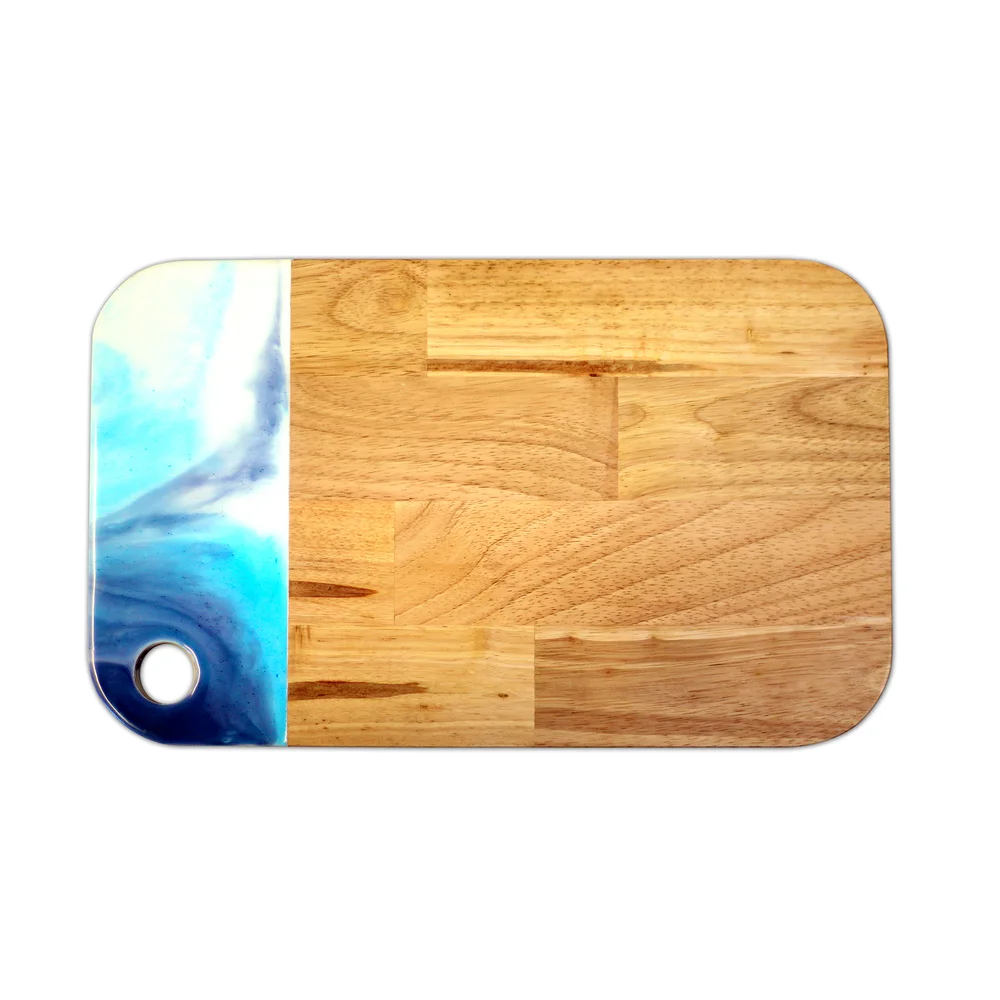
/ How To Make A Resin Cutting Board : I used three types of blue for one, blue/green, cobalt blue and caribbean blue.
How To Make A Resin Cutting Board : I used three types of blue for one, blue/green, cobalt blue and caribbean blue.
How To Make A Resin Cutting Board : I used three types of blue for one, blue/green, cobalt blue and caribbean blue.. It will scratch like crazy and i notch sensitive so it will be more likely to crack. I would recommend against using resin for a cutting board. When autocomplete results are available use up and down arrows to review and enter to select. How to make an epoxy resin serving cheese board using #artresin. Mix resin add equal amounts of each bottle together in a cup or measuring cup.
After studying a bit about creating with resin, i decided to try my hand at pouring resin and adding color to create a beautiful marbled effect on cutting boards. Place the tape on both sides of the cutting board as you will be coating both sides. Mix the resin for at least 4 minutes, making sure to scrape the sides of the cup to get all the resin mixed. When autocomplete results are available use up and down arrows to review and enter to select. I dug through my scrap wood pile for some black walnut.
Diy Resin Fluid Art Cutting Cheese Board Wedding Gift from somethingturquoise.com Handcrafted walnut & resin flowing river cutting board 18x12 resin w/juice grooves new (engraving available) blue river. About press copyright contact us creators advertise developers terms privacy policy & safety how youtube works test new features press copyright contact us creators. Also since it is so hard it will be murder on your knives. Pour the white resin over the handle and spread it right out to the edges with the long side of the stir stick, allowing it to flow over. Let's get ready for a bit of fun! I used 6 ounces of each to do 3 boards. I used three types of blue for one, blue/green, cobalt blue and caribbean blue. I would recommend against using resin for a cutting board.
To get this vibe i cut some curves into the wood board with my jigsaw and planned to make an oblong curved mold to place it in.
Inspired by nature, each unique design captures the essence of natural landscapes. Setup for the resin and mica powder pigments for the pour. The two cups in the picture are for two cutting boards. My biggest tip when paint pouring is to prep your work space. Epoxy for cutting boards, just say no. I made a resin and wood cutting board blank using wormy walnut wood and epoxy resin. But really, any boards will do. It will scratch like crazy and i notch sensitive so it will be more likely to crack. Taking care to seal the corners. When sealing the cutting board be sure to only use food safe products, such as the sealer that i am using, walrus oil and walrus wax. Just make sure you get something that is food safe. This created the two sides for each cutting board. Rotate the cutting board and repeat the process for each side.
Setup for the resin and mica powder pigments for the pour. To make sure the epoxy won't stick to it, i wrapped the whole thing in tuck tape. I dug through my scrap wood pile for some black walnut. I made a resin and wood cutting board blank using wormy walnut wood and epoxy resin. Place the tape on both sides of the cutting board as you will be coating both sides.
Resin Cutting Board Relic Design Craft Co from images.squarespace-cdn.com After the resin has cured, flip the board over. After they were planed, i removed the bark, cut the boards to length, and split them down the middle. About press copyright contact us creators advertise developers terms privacy policy & safety how youtube works test new features press copyright contact us creators. Mix the resin for at least 4 minutes, making sure to scrape the sides of the cup to get all the resin mixed. Apply the heat gun to the surface of the resin. Press the tape firmly onto the cutting board so that no resin will go under it. This was a really fun project, and a great way to dip your toes into lar. First, we need to make the cutting board.
This was a really fun project, and a great way to dip your toes into lar.
Touch device users, explore by touch or with swipe gestures. To get this vibe i cut some curves into the wood board with my jigsaw and planned to make an oblong curved mold to place it in. Mix the resin for at least 4 minutes, making sure to scrape the sides of the cup to get all the resin mixed. When autocomplete results are available use up and down arrows to review and enter to select. First, we need to make the cutting board. Mix resin add equal amounts of each bottle together in a cup or measuring cup. Handcrafted walnut & resin flowing river cutting board 18x12 resin w/juice grooves new (engraving available) blue river. I used 1/2 plywood for my mold. Inspired by nature, each unique design captures the essence of natural landscapes. Use a baltic day epoxy resin pigments and resin with a 1:1 mix ratio. I made a resin and wood cutting board blank using wormy walnut wood and epoxy resin. I used three types of blue for one, blue/green, cobalt blue and caribbean blue. Pour the purple and red resin diagonally across the surface of your resin cheese board.
Apply the heat gun to the surface of the resin. We used a kit available from totalboat which came with almost everything needed. After they were planed, i removed the bark, cut the boards to length, and split them down the middle. Also since it is so hard it will be murder on your knives. When autocomplete results are available use up and down arrows to review and enter to select.
How To Make A Wood Resin Cutting Serving Board 6 Steps Instructables from content.instructables.com First, we need to make the cutting board. Touch device users, explore by touch or with swipe gestures. Inspired by nature, each unique design captures the essence of natural landscapes. About press copyright contact us creators advertise developers terms privacy policy & safety how youtube works test new features press copyright contact us creators. I would recommend against using resin for a cutting board. This is about how to make live edge boards into epoxy resin cutting boards! My biggest tip when paint pouring is to prep your work space. Let's get ready for a bit of fun!
I dug through my scrap wood pile for some black walnut.
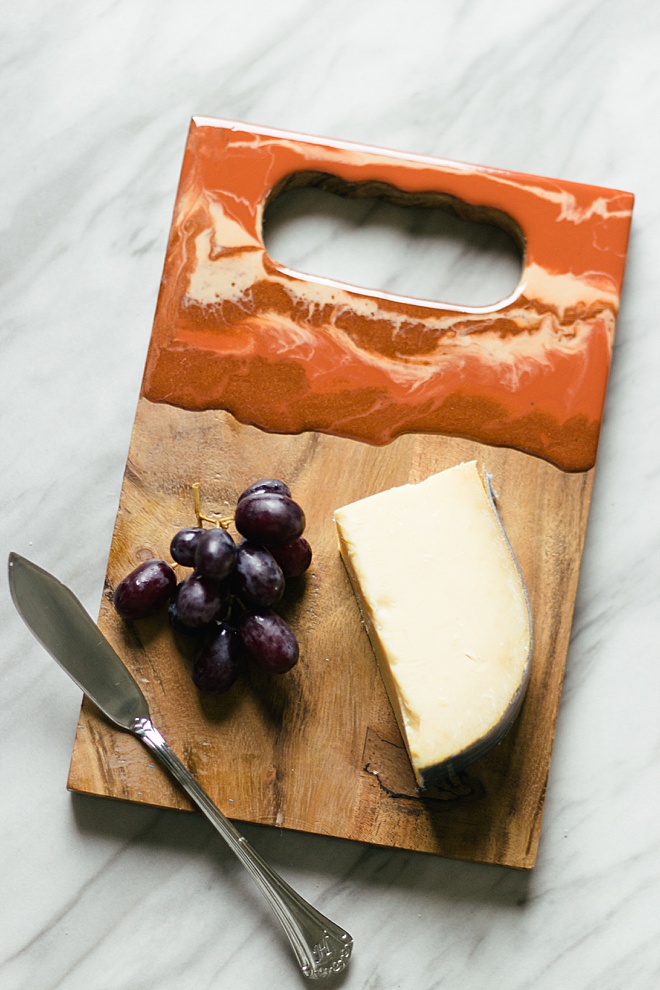
Grab a rag and with a few drops of oil and some elbow. We used a kit available from totalboat which came with almost everything needed. At this point we can start to pour our resin onto our actual cutting board… starting with the basic colors (the white, blush and clear with rose gold flakes) then you can add the darker colors (like the copper and rose gold glitter) in thinner sections across the seams of the larger areas. To get this vibe i cut some curves into the wood board with my jigsaw and planned to make an oblong curved mold to place it in. When sealing the cutting board be sure to only use food safe products, such as the sealer that i am using, walrus oil and walrus wax. I used 6 ounces of each to do 3 boards. The two cups in the picture are for two cutting boards. This is about how to make live edge boards into epoxy resin cutting boards! After they were planed, i removed the bark, cut the boards to length, and split them down the middle. 5 out of 5 stars. I used 1/2 plywood for my mold. After studying a bit about creating with resin, i decided to try my hand at pouring resin and adding color to create a beautiful marbled effect on cutting boards. Handcrafted walnut & resin flowing river cutting board 18x12 resin w/juice grooves new (engraving available) blue river.
